My Sew Sew Life-A Long Promise Finally Kept

A very long time ago, when I was a small girl, the local grocery store would get in wonderful toys right before Christmas. One year, I fell in love with the Cinderella doll. And I did get her! I never scored very many dolls so this was a big deal. After all these years, she is still with me. ‘Rella was pre-Barbie, so for the time, this was a high fashion doll.
 
‘Rella was originally dressed in a beautiful gold and pink tulle ball gown, which disintegrated ages ago. The pair of silver plastic shoes also disappeared.
 
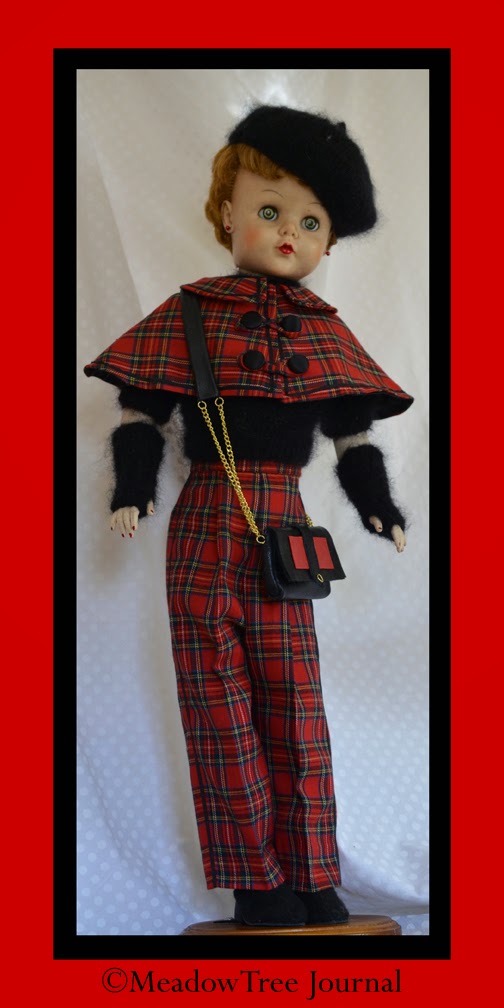
‘Rella in her new top to toe outfit.
 
She is 29 inches tall and I’ve not found patterns for her. My Mom found one for a 32 inch doll (see below) and used that in the three garments she made for her all those years ago. For decades, “Rella has been barefoot and dressed in a limited and increasingly distressed wardrobe.
 
.
A very old and worn pattern, but all the pieces are there. The styles don’t fit Rella’s image and are not a perfect fit. But it gives me something
to work with.
 
For years, I have promised myself that I would make the old girl something new*. I finally did. I don’t think this design is extremely fashion forward. However, it does fit the look of the doll.

I made seven pieces in all. To keep this simple, I have organized them in a list each with a little blurb.  
Fitted Pants-I adapted the pajama pant pattern to create a fitted pant with front pleats, back zipper and waistband. Next time, I am going to try and cut a new fitted pattern, rather than trying to fit that on on the doll. 
 

Lined Cape With Collar-This is pretty much the original. However, I wanted a collar and cut a pattern. Black grosgrain ribbon detail is used on the collar and cape (and also down the pant’s side seam). 

I made these two garments from a fabric remnant from my Mom. It was in a dresser that I took home after she passed (along with all her patterns). I had seen this fabric as long as I can remember and have no idea where it came from. I know it has been around at least forty years. Sophia and Niko (my Poodles) also got Christmas outfits out of it. I still have some left!
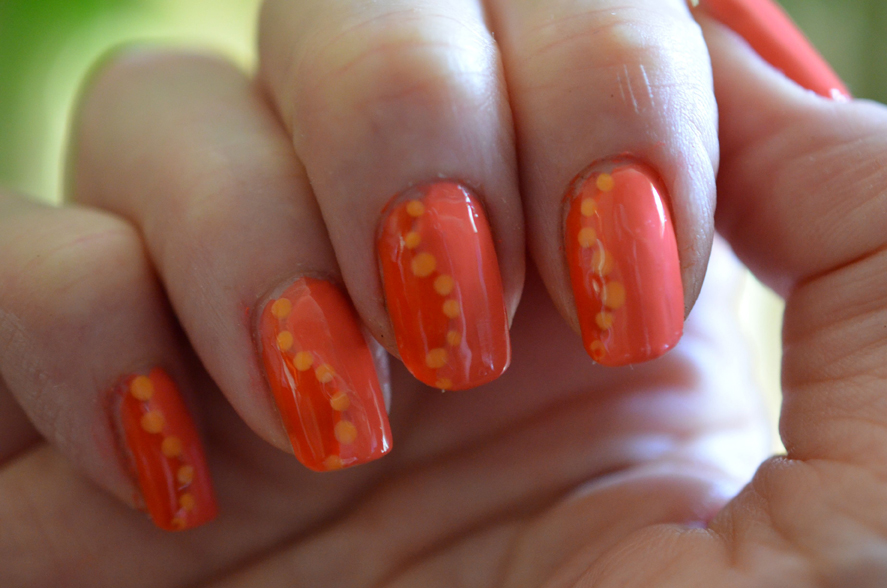
A side view showing pleats, waistband and grosgrain ribbon tuxedo stripe down the side of the pants. Also, it’s a good view of her new mani!


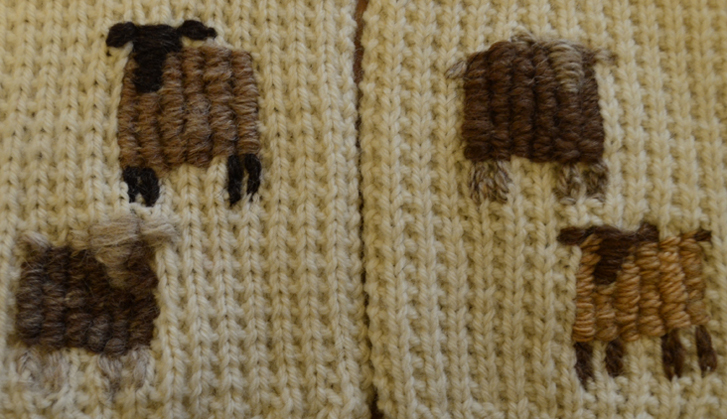
Short Sleeve Sweater, Arm Warmers And Beret.-I designed the sweater and arm warmers. The beret came from Ann Budd’s book The Knitter’s Handy Book Of Patterns. I used the 0-6 months size. 

The back of the sweater has a placket with vintage mother of pearl buttons.

 
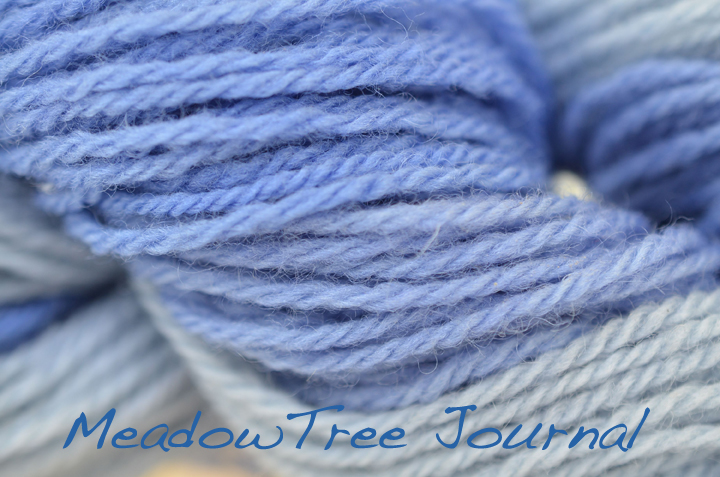
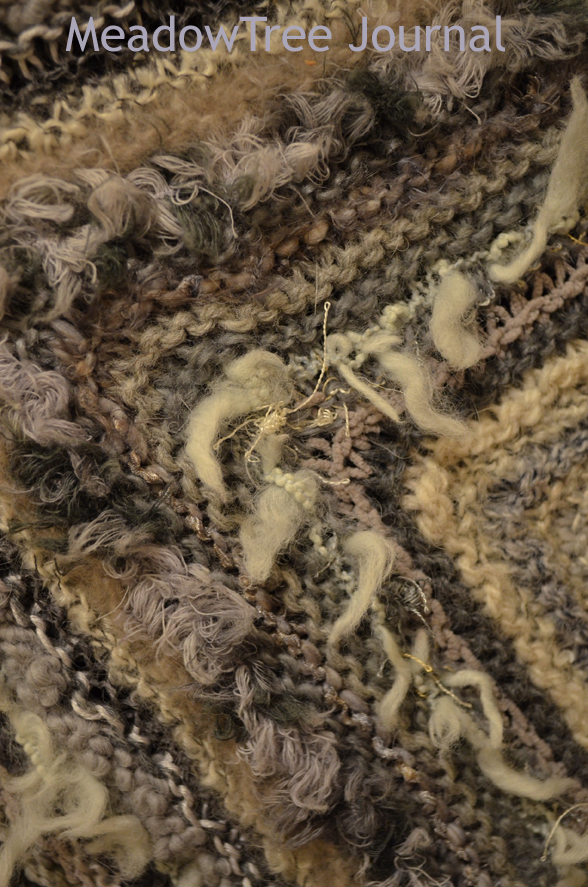
The yarn used is Trendsetter’s Rapunzel. It is a Mohair and wool blend. This yarn was one of my Tuesday Morning finds.
 

Shoes (actually boots)-These are made from some fairly thick black felt. They have leather soles and heels created from Sculpty clay. I lined the top inside so they could be turned down for a different look. Shoes are always going to be a challenge. They are a whole different ballgame from regular sewing.
My research has found a wonderful and knowledgeable resource from Finland. Tarja Simpanen has a wonderful blog and website with valuable information about creating doll shoes.  
 

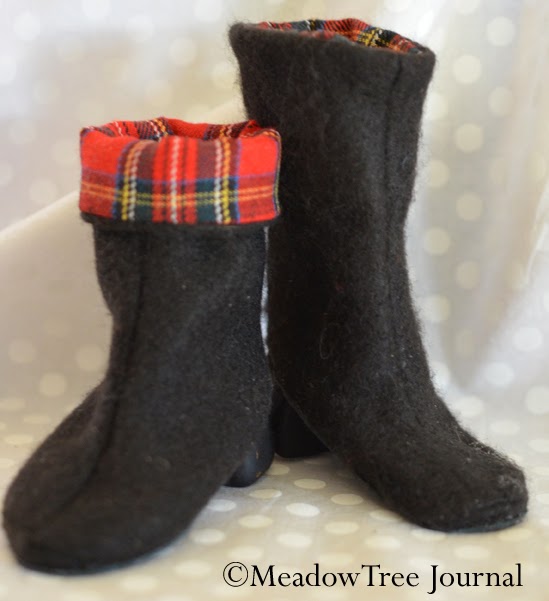
The boots showing the option of the turned down cuff. 


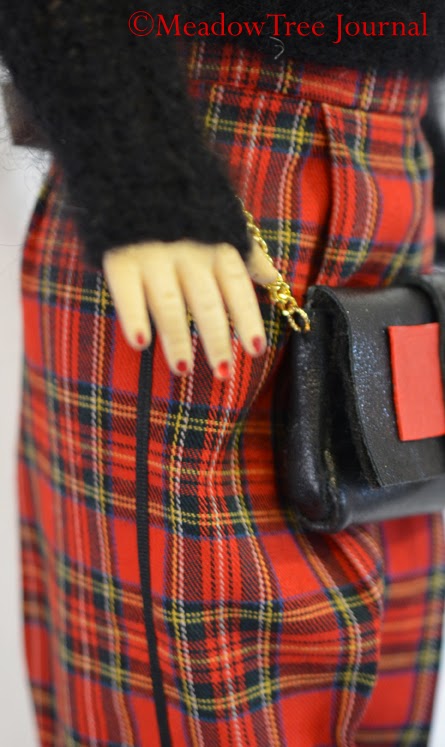
Purse-I designed this using leather and jewelry findings. Fortunately, I have an ancient heavy-duty Singer sewing machine that will sew through fairly thin leather with ease. 


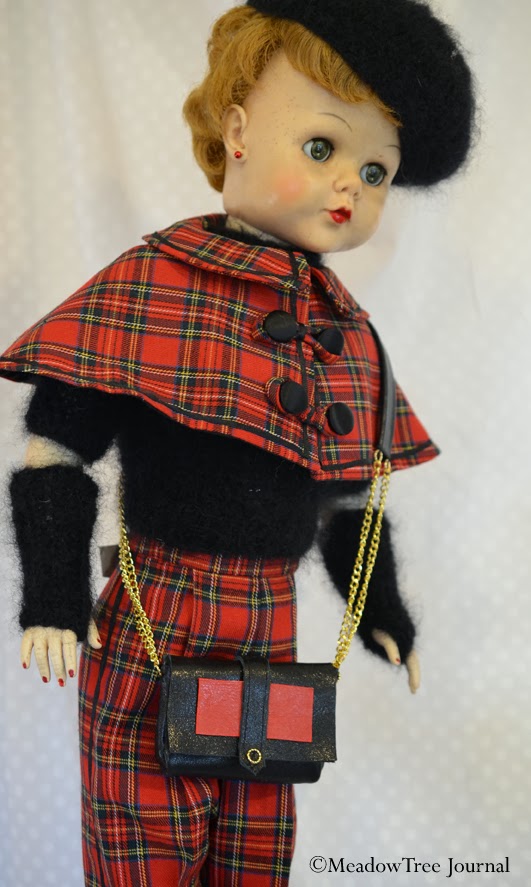
 A closer view of the purse.

The only thing I bought specifically for this project was the Sculpty clay. I scavenged everything else from my stash.


I had a great time with this project. It covered a lot of different skill sets and made me research on how to do some aspects. 


* I have actually knitted one top for ‘Rella. I wanted a sample for my Simply Color fiber class, so decided to “kill two birds with one stone”, as the old saying goes. However, nothing goes with the knitted top. Next doll design project?
 

Save

Pantone’s Color Of The Year

According to Pantone, it is Radiant Orchid for 2014.
What do you think? I happen to love it!
 

The nail polish companies can react the quickest. Orly already had their polishes on their Facebook page today. 


This is a color swatch of my Pro WF Deep Orchid 826 from Pro Chemical and Dye. I think it is a pretty good match. 


 I will have to try it out on my merino/alpaca fiber that I I had processed from Shepherd’s Mill.

Spinning a Yarn-My Paris Sweater From Ralvery

It’s getting to be cold again. I decided to republish my blog post on the Paris sweater. 

I finally finished the Paris Sweater. This is a free pattern on Ralvery and is designed by Sarah Keller. If you can knit and purl, you can knit this pattern. 

The sweater is created from a 22″ x 66″ rectangle. I would pick a yarn no heavier than a DK. I used a silk sport weight cone yarn that I purchased on DNBY a few years ago. I am pretty sure it’s name was Olive Grove, but don’t remember the maker. Did anyone else get this yarn? It really bugs me that I can’t remember who made it. 

This pattern has a draped asymmetrical tunic look, so make sure you are confortable wearing this type of style. I did add some black corded elastic around the neck area. The neckline tends to do the “Flashdance” thing and I didn’t want to wear a tank under it. That was just me, you may want that look. 

I like this sweater and it does get complements. I am not a beginner knitter, but enjoy the pleasure of just knitting with beautiful yarn and not worrying about what I have to do for each row. If you are a Ralvery member, click here to view the pattern

A Close Up View Of The Elastic


The Yarn


Spinning a Yarn-“Take The Pain Out Of Counterpane” Shawl


Here is the shawl laid flat. Thee counterpane squares 
are sewn together. The lace is knitted separately 
(a great small take
it with you project) and then crocheted 

or sewn to the shawl.
I finally finished my “Take The Pain Out Of Counterpane” shawl using lace weight 2 ply yarn that I handspun. This is a project that evolved from my class, which I developed and teach mentioned above. 

Unfortunately, I didn’t keep records on the yarn. I think it is Merino, Mohair, and silk. I’m glad I had enough because it would have been a problem to reproduce it. This is why is is always smart to keep records, even if you think you will never need any more of what you are making. This has to be one of the few times that I didn’t take down very specific notes on a yarn. And hopefully, it will be the last time. I think I learned my lesson. I was getting very worried at the end of this knitting project because it looked like I was not going to have enough yarn to finish with. 
 
For anyone not familiar with this class, here is my class description”.
 
“Explore a historical (Counterpane can be found as far back as the 15thcentury) technique with new twists. I have created a system that combines classic Counterpane patterns to make very modern designs.  After this class, students will be able to combine patterns learned to create hats, scarfs, shawls and more. Students will also learn or review knitting simple lace patterns.  The Counterpane squares will be knitted on double-point needles and lace on straight needles. Participants will leave with a booklet of the patterns covered in the class to further their experimentation to create their own original designs. “

 
The front as it naturally lies. I don’t know why, 
but the edges just naturally overlap 
(tad good thing).
I can also see a cool pin down there


The back of a counterpane garment is always
the more dramatic, I think


The side sits short right at the arm. 
This is great. It helps the shawl to 
stay in place and does not 
interfere with activities. 
A close up of the single crochet that I used to
connect the square panels.
 
A close up of the lace edging. this is
a 9 stitch-6 row pattern and very
easy to memorize.


Just for the fun of it, I added some Angora around the neckline for some
extra softness.


And of course, there are always more then one
way to wear this
shawl.
I did consider color.
However, after dying
these three
steps of blue violet,
I decided that I just wanted white.
But, I now have some beautiful
Periwinkle yarn!


This is my second larger project. The first was “The Beast”, a jacket, which can be found HERE.

As usual, if will be a while before I have anything else for this blog. I am working on a pair of socks, a “Change Of Row”(another technique that I developed) lap blanket and want to finish another counterpane project that I started about four years ago.
 
Take Care and stay creative,

Simply Color

Hello, it has been a bit since I have blogged on the Journal. But I wanted to put up some photos of Fiber U that just happened this past weekend. This event, in Lebanon, Missouri is becoming one of the premier summer fiber happenings in this area.  Last year Michael and I attended as visitors and I did a blog about our experience

In the back of my mind I knew I wanted to come back as a teacher. I submitted my “Simply Color” class and it was accepted. I had a great time this weekend teaching one of my favorite subjects, color theory. The class is geared towards the fiber arts because, well, that’s what I do.  So here is a few shots of my class.

After my lecture, students traveled to different mini-stations to experiment with color.

Using hand combs to blend dyed fibers to experiment with color combinations


Looking at color swatches through a kaleidoscope, one of my favorite things to do. 


Color drafting patterns to test combinations. This is really good for color-way knits such as Intarsia and Fair Isle


Another view of color blending


What can I say, I’m a teacher, I usually have something to say-and hopefully it is
halfway helpful.
My sample table with items I’ve done to show different color relationships. It has the simplest such as
monochromatic to one of the more complicated, the Square Tetrad. I also have out a few books that

I use. Color Works by Deb Menz is one of
my favorite. 
Using watercolors to practice how to mix colors to achieve desired results-good practice for future hand dying projects.


 Anyone who knows me knows that I love nail polish and nail design. This was my design for my color theory class.
It’s not exactly analogous, probably closer to monochromatic.


To top it off, my daughter Michelle took a day off from her very busy life and attended the event with me. This made it all the more special. She took a rug hooking class and enjoyed it very much. 

It will be awhile again until I post on the Journal. I am still working on my Counterpane scarf/shawl and need to work on a dye combination before I can call it done. 

Spinning a Yarn-My Counterpane Sweater or “The Beast”

 
My Beast-The final knitted on band balances the counterpane squares with a nice vertical look

I have just finished a new jacket that I have christened “The Beast”. I designed it using ideas that I teach in my knitting class, “Take The Pain Out Of Counterpane.”
If you are not familiar with counterpane, here is a small history of the counterpane knitting technique.
 
History
 
The Counterpane can be found as far back as the 15thcentury. The Oxford English Dictionary describes the Counterpane  “The outer covering of a bed generally more or less ornamental, being woven in a raised pattern, quilted, made of patchwork, etc.; a coverlet, a quilt”.
 
During the middle 19th century “Counterpane” became more specialized. Museum samples show it to be a hand-knitted or crocheted bedspread composed of squares knitted on four double pointed needles, and then sewn together to create a completed bedspread. These knitted covers were generally white, textural (still keeping with the 15th century “raised pattern”) and geometrical masterpieces.
 
The back shows off one counterpane square beautifully
 
My Take
 
I use this traditional technique and create modern items. Up to this point, I have only knitted hats, mitts, and scarfs. It was time for a sweater, especially, as I am teaching the course this summer at the Mid-West Weaving Conference (Emporia, KS) in June. 
 
A view of the three squares before sewn together. 


The Beast Itself
 
The sweater is knitted in all garter stitch. This makes for a lot of texture, which I like in a sweater. Yarn is changed every two rows. This sweater is a great “stash buster”. Every yarn came from my very abundant yarn collection. I even had the button.
The yarn that gives the jacket its name is “Hippy” by Katia. Half way through the sweater I just knew I was going to trim some of “Hippy” down when I finished. But I tried it on and absolutely loved the way it worked.  This iss a true statement sweater.
 
Construction
The body of the sweater is three 21 3/8” counterpane squares sewed together. Each square was bound of on three sides with one side left with live stitches. These stitches were put on a piece of waste yarn.
 

After sewing the three squares together, the live stitches were picked up on a circular needle. Staying with pattern, I knitted a band of about 3.5”. The band is the bottom edge of the sweater.  When finished, I had a large rectangle of 64” x 25”. 

 
Leaving 9” for the back neck, the sides are brought up to the top and sewn into place.
 
I finished the piece off with a knitted I-cord button loop and a knitted I-cord edging for the back neck.
 
This piece fits in nicely with my  “Great American Apparel Diet”. Even though I have given myself leeway to purchase anything to finish a garment, I had everything I needed for this piece. 


Close up view of the stitches and yarn. The squares creates a triangular effect on the arms which contrasts nicely with the vertical look of the band and the square on the back
 
 
This photo shows a close up of the knitted I-Cord edging on the back of the neck. It gives stability and a nice finished look.
 
My next project is to finish a knitted square counterpane scarf that I started three years ago. So this will be the last article from me on this blog for a while. 
 
I am trying to talk Michael into donating some of his gardening insight for The Journal. After all, it’s that time of the year again isn’t it.
 
So until next time,

Over-Dressed-The Shockingly High Cost Of Cheap Fashion

Here is a piece that I have been working on for a while. I read this book in March and given the news coming out of Bangladesh, I wish everyone could read it. 

As someone long interested in design and fashion, I put Elizabeth L. Cline’s Overdressed: The Shockingly High Cost Of Cheap Fashion on my “have to read” list just after its publication in June of 2012. Once in my hands, I could not put it down. Cline gave words to impressions that my heart suspected. When I was happily getting good deals for clothes at TJ Maxx or Target, my head ignored my heart’s vague discomfort. I didn’t care to think or know about what was behind those dramatically low prices.


Cline clarifies how those good deals were not only bad for me but for a lot of other people—and our earth.


Beginning about 1990, retailers began playing a sort of “Race To The Bottom” game. Retailers began moving their garment manufacturing mostly to China where workers were plentiful and wages were low. Manufacturing costs were so low that those retailers then had a marked competitive edge over domestic made goods.


Within about ten years, garment manufacturing in the United States essentially shut down. All the equipment was sold to companies mostly in China.


 Retailers were able to dramatically change how consumers shopped. Consumers began expecting low prices while accepting low quality. 
Wall-Mart, Target, H and M, Forever 21, Ross, TJ Maxx and the like cleverly trained us to look for “what a great deal” rather than “what a beautiful and well made garment that I will want to wear for years.”


The change in mindset included no longer fitting or altering garments. It is just easier to throw away than to repair or alter.  And throw away we do. There has been such a fluctuation in the used market of clothing that The Salvation Army and other thrifts can only used 20% of what is given to them. Much of what is donated is in too bad of shape for even the third world and is sold to second parties to turn them into rags. Five percent is not even fit for rags; about 41 million tons–is destined for landfills.


There has be a small glimmer of light. In recent years, manufacturing in China became more expensive. Smaller countries just don’t have the people or the set up to handle the massive undertaking involved in garment manufacturing. Thus a small number of companies have resorted to making some of their designs back in the old U.S. of A. Carol Kane is one example.


What Am I Going To Do?


I am lucky with one aspect. I was born in 1950 and remember a good product and not getting too much of that product. In lieu of that, my Mother taught me to sew.  Those skills have not been forgotten or neglected. I have made a few things the last couple of years. I think I will be making a few more.


Two years ago the movement “The Great American Apparel Diet” was born.  The rules are very simple. Do not buy any new clothes for a year. I have taken this pledge, which started April 12th. So I have only been on this for a week. There are a few exceptions that I have made.


I can buy material (after I have used the stashed stuff) and any notions needed to finish these pieces. You don’t have to, but I am not buying shoes or bags for a year—with the exception of black flats (one weakness that I’m not going to give up).


I will keep updates on this blog. Refashioning is a new trend and I have plenty of stuff to refashion.I will also feature Michelle’s refashioning. She went to the thrift and bought quite a few promising outfits. I can’t wait to see what she turns them into.
Taking The Pledge With Me


When I vacationed in Florida, I loaned my book to my oldest daughter. When I returned, she decided to take the pledge with me. I have shown her a few things about sewing over the years and she has already completed a dress. Thank goodness for texting with photos. We re-cut a pattern using our IPhones and the dress fits her beautifully. Michelle has a closet full of thrifted articles that she is going to refashion and that will be an interesting thing to watch.
Some Good Links


The Great American Apparel Diet’s websiteThis project began in’09. I feel that it is a pledge that anyone can take at any time. Mine started April 12th, so I am only three weeks into it.

The ReFashionista Blog-Jillian Owens thrifts outfits and remakes them into chic and wearable fashion. It is full of inspiration.

The Good Guide-find products based on science and ethics. Clothing companies are also listed here based on their human relations. 

An Interview with Elizabeth L. Cline by NPR’s On Point  last June when her book was released. 

That is it for this time. I have just finished a sweater using stashed yarn that I can’t wait to get on here. Oh yes, I am not buying any new yarn for year also. So everything I feature, will be out of my (massive) stash of yarn. It just gives me more money to spend on nail polish!

A Blog Sharing A Blog

I have mentioned before that Threaded, a Smithsonian blog, in one of my favorites. Here is an article that I don’t want people to miss. It is entitled The Story Of Elizabeth Keckley, Former Slave Turned Mrs. Lincoln’s Dressmaker. It has now been turned into a play. Threaded gives a good background on Todd’s and Keckley’s relationship. 

Mary T. & Lizzy K. runs through May 5, 2013, at Arena Stage at the Mead Center for American Theater. Illustration by Jody Hewgill.

The Link is HERE

Spinning a Yarn-Coffee With My Walnuts Please

      No, I am not having dessert, just a bit of           
                          kitchen dying.

Coffee and Walnuts Shibori silk lining


Kitchen dying has been one of my activities this past year. Wanting to line a knitted scarf with silk, I decided to have my fun in the kitchen rather than downstairs in the dye lab.
The silk was from the bolt, so I gave it a good machine wash and dry to shrink it and get any sizing out. I had a few hard lessons in this department earlier this year. 

Coffee With My Walnuts Please

No, I am not having dessert, just a bit of kitchen dying.
Coffee and Walnuts Shibori lining
Kitchen dying has been one of my activities this past year. Wanting to line a knitted scarf with silk, I decided to have my fun in the kitchen rather than downstairs in the dye lab.
The silk was from the bolt, so I gave it a good machine wash and dry to shrink it and get any sizing out. I had a few hard lessons in this department earlier this year. 

 I then wetted the silk out, brewed a good pot of coffee, mixed it and some vinegar in a pan and simmered the silk on low for about an hour.

We had some very old black walnuts in a shed. I removed the husks ( I used the walnuts whole), simmered them in water for one hour, cooled the mixture, and strained the liquor.  
Meanwhile, I simmered the now beautiful coffee tanned silk in a solution of alum and cream of tartar for a mordant,* then let it then simmer in the walnut solution for an hour and let it cool. Finally, I took the band wrapped marbles out to see the pattern.

During this process, I was pretty careful to make sure the dye baths never boiled. I try to baby the silk. 

I am very happy with the results. This is a perfect subtle pattern for my scarf lining. 


Section of the scarf that I lined.   The lining  covers up the embroidery in the back.  The sheep are some of my handspun from my Shetland flock

I now have a liter of Black Walnut juice in my freezer in case I have to do this again! 

*a substance used before the application of a dye, possessing the ability to fix the dye in textiles. Mordants can also effect the tone that the dye takes on.  There are other types of mordants, alum is just a very safe one.


Design a site like this with WordPress.com
Get started