Spinning a Yarn-Seeing Purple (for quite a while now)

 
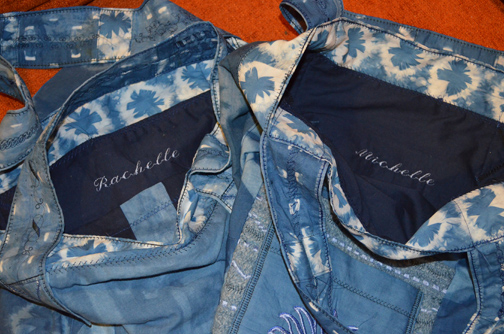
What started out as a small project for my newly adopted Poodle Sophia turned into a two-year marathon for my youngest daughter? 
I vaguely remember how all of this started.  In the beginning, I dyed some of my machine spun Shetland yarn to make a sweater for Sophia.  The people who spun it (some one in Colorado) really did a botched job and I didn’t think the yarn was fit for human use. I dyed the yarn Barbie pink*. In my hurry to dye, I forgot to loosen the factory ties, so ended up with pink yarn with white stripes. Needless to say, Sophia got a sweater out of some different yarn. 


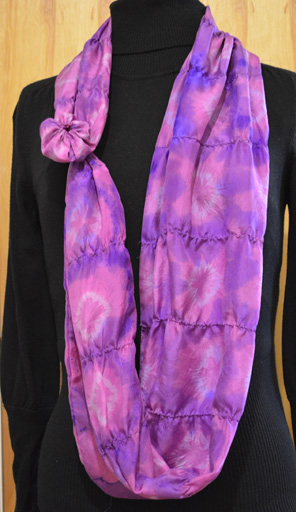
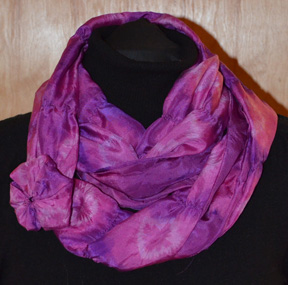
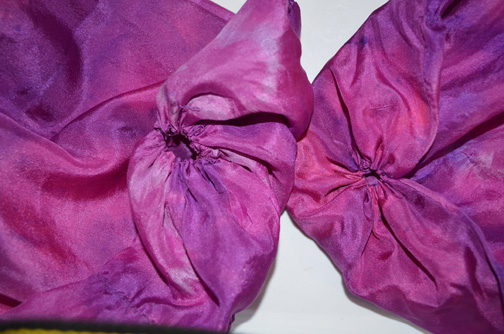
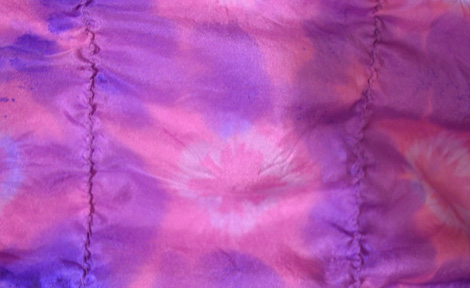
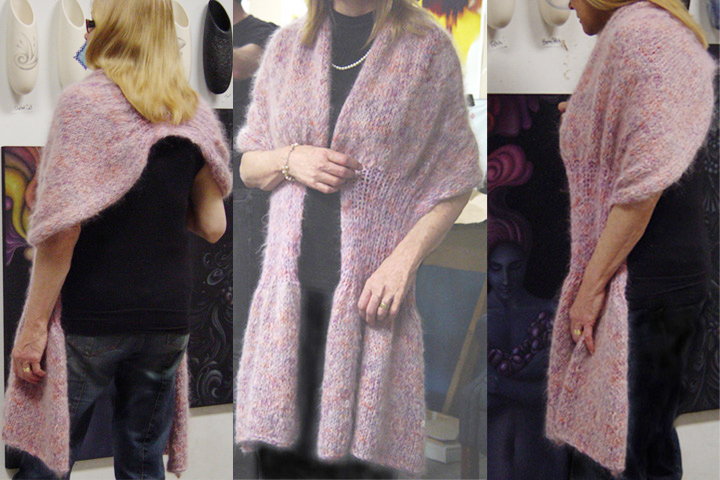
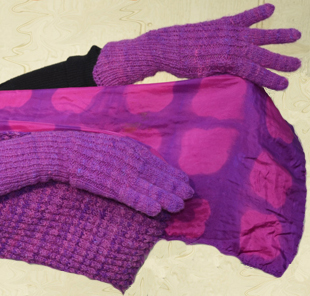
The pink on the left was the original base color.  Using violet over-painting I created  light, medium, and dark yarns to work with.
 
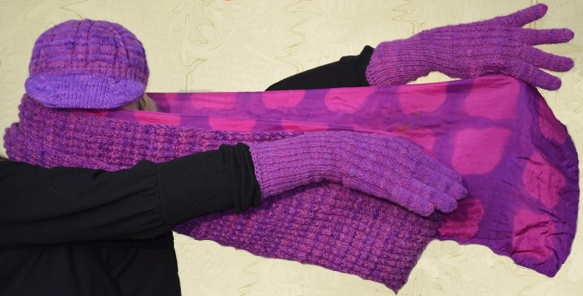
So there it sat, for a few months, my ugly pink yarn with the white stripes.  I must have been bored one day because I got out my foam brush, spray bottle and purple dye** and started painting.  Rachelle saw the yarn and loved it.   When dyed multi hues, the yarn really didn’t look too bad.  The flaws just didn’t glare out at you anymore. I came up with three shades, light, mid-tone, and dark.  This was a good initial decision because over the next several months, I would have to come back and re-dye, re-dye, and re-dye.  In retrospect, this probably was not the best-planed project.  Coming up next, the gloves.   Stay tuned.
* I have been using the same pink dye forever. It is 608 Pink (Primary) from Jacquard. These are the dyes that I first started using.  It is an acid dye, good for protein fibers.  Jacquard is a good dye for beginners. Vinegar is it’s only requirement.  Although, I have changed over to a different brand, I keep this one around.  I just like the color.  Use intensely, it is a great deep red-violet. Used sparingly, it creates perfect ranges of pink.  I love it as an under-base for violet.
 
** My violet is Sabraset Violet 880. I pretty much use Sabraset exclusively. My opinion is that they are the best when it come to light fastness. They do take a little more work.  Auxiliaries such as citric acid (vinegar can be used, but it takes a lot more the c.a.), salt, sodium acetate, and Albegal SET need to be used with them.  For me, it is worth it.


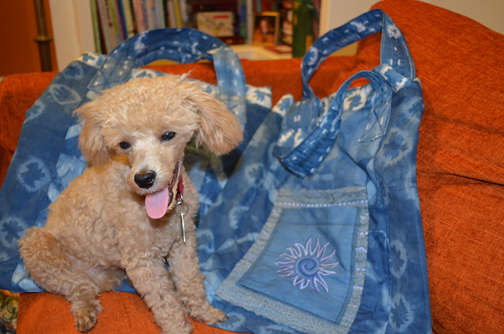
Sophia modeling the sweater that she finally got. I ended up using Debbie Bliss yarn in peach, mint and natural.


Save

My Sew Sew Life-2 Botched Linings=1 Scarf

There has been a hard and time consuming lesson this week. It is that the silk that I purchased shrinks. I decided to line a scarf that I had knitted for one of my daughters. After dying and doing Shibori resist on lining #1 it came up a good 4” to short. I chalked this up to me just not paying attention and cutting it too short.
So I start lining #2. I knew it was the right length so I go crazy on it with the Shibori. Started to pin it and again to short! OK, they say the third time is the charm. I cut the new lining way longer than I need and am still working on it.
So one of my commandments is. “Thou shall not waste silk.“ So one can always use more scarfs, right? I sewed the pieces together and decided to gather the ends. I can loop one end through the other and come with something that looks like the old fashioned quilting yoyo. I’m happy and no wasted silk. But I am still keeping my fingers crossed when I pin on the new lining!
                             Another way that I like to wear this scarf

How To Make Your Own Scarf
1. Cut two rather thin pieces of material of pattern of your choice. They need to beat least 10 ½” by 61”. * I used ½” seams for a finished scarf of 9 ½ “ x 60”.
2. Sew the rectangles together, leaving a small area un-sewn to turn the fabric.
3. Turn fabric and press.
4. Using a hand needle and thread gather each end of the scarf.
5. Then sew the corners of each end together. (See picture below)
6. Push one end through the other to create a rosette.
7. Your scarf is finished.

Want to dye some silk yourself? Dharma Trading is a great place to get silk and dyes. Dharma also has  an endless supply of dyable fabric and clothing.

My second lining was wider than my first. Rather than cut it down and lose some of my pattern, I gathered it every 3 ½ “. I really like the effect, but it is not necessary.
Examples of the gathers. I used black elastic thread, just as a experiment. However, it is not necessary. A gathered stitch should work fine.

This is a quick and easy project. Have Fun!

Save

My Sew Sew Life-My Seamstress Heritage

I published this post quite a while back, long before I was comfortable being in front of the camera. At that point in time, my blog was solely about art, design , sewing, kntting and poodles.

The fitted blouse that I created from one of my mother’s patterns has continued through the years to be one of my favorites.

featureoriental
I’ve worn this top constantly thought out the years and never tire of it. This photo was taken  just this Fall (probably around October, 2019), when the Kansas City Symphony was still having concerts.


My Mother was a knowledgeable, technique driven sewing teacher when it came to her oldest daughter.  She held every project up to the highest expectations. Many a seam would be ripped out if it didn’t meet approval. I was that daughter.  She always wanted my garments to be the best I could sew and always said, “and don’t forget that the inside needs to look as good as the outside”.

I inherited her patterns. Sometimes I go through them just to look.

My green Asian blouse was created from one of these patterns.  Pictured is the blouse and pattern.  I kept the neckline, which I thought was wonderful.  The sleeves are the same.  However, I re-cut the bodice into a blouse shape, added darts around and am very happy with the results.

The material showed a tendency to fray.  So remembering Mom’s words, I bound all my interior seams, for a very finished look.

 Happy sewing and always take a re-look at those old patterns. You never know what inspirations you will find.

Take Care Everyone
name

Save

A Great Mid Century Sign

Every time we visit the kids in Joplin, I admire this great motel sign. It is on the southern end of Main and close to Route 66. I understand that the motel has seen down times, as most motels from this era, I would imagine. I wish the owners would realize what a true mid century gem they have and do some up-keep on this wonderful sign.  This picture was taken a week before the horrific tornado.  However, it is well south of the tornado’s path and I think it is in decent shape. 

Save

Spinning a Yarn-The Fling

Three years ago I decided to design a wrap that one could fling on and off and that would stay in place without the use of a shawl pin.  While shopping in Saint Louis, I noticed this scarf that undulated in and out.  I though I could do that same concept with a shawl.  The idea for “The Fling” was hatched.
Once I made it, I decided that it would be wise to write down the pattern while it was still fresh in my mind.  Once I had the pattern done, I had to figure out what to do with it.
I first ran it past Knitty.com.  They didn’t want it.   My crowd wasn’t right, I guess.  So on the computer it sat, for about a couple of years. Finally,  I decided that it just seemed right to  share it with other knitters and  get it  out there in the world.
My daughter Michelle and I are both members of Ralvery.  She is a serious member, but I not so much.  Yesterday morning, I turned my pattern into a PDF and uploaded it to Ralvery as a free pattern.  Guess I now see the value of Ralvery.  I have been amazed by how many down loads it has gotten.
My next pattern project will be turning “The Flock” into a PDF, which means rewriting it top to bottom and getting it uploaded. However, it will not be free.   The price will be the same as it always was.
And Ralvery? – I just found a mother-load of free Barbie patterns to knit from Europe.  Ah, some day…………..Think I am hooked on Ralvery.  It you are a Ralvery member or a future Ralvery member, feel free to find me.  I am Meadowtree.  Also, the link to my free download is http://www.ravelry.com/patterns/library/the-fling-Knit On!

Save

Superclusters


 Sharing the work of Rachelle Gardner

“Billboards are typically utilized as a way of advertising commercial products or services on a large scale. Playing on this idea, these images for the Missouri Bank Art Boards (Fall 2012) represent the largest structures in the universe presently known to mankind. In a time filled with economic gloom, where one debt crisis after another rises to the surface of our attention, it is easy to lose perspective on the true scale of things. Perhaps a reminder is in order for what constitutes a big deal on a universal level and the biggest deal of all is, in fact, galaxy superclusters.” Quote from Rachelle Gardner

Dogs Of Dreamtime


Dogs of Dreamtime was loaned to me by a friend with the prediction of, “This is your kind of book.” Her prediction proved to be correct. At first, I think I was a bit skeptical that the author’s original Sheltie Kiera, could come back in the form of a second dog. By the middle of the book I was a believer.

Karen Shanley has written a memoir of her life with three dogs with some very special coyotes. It is mystical, spiritual, and will bring a few tears. Dogs of Dreamtime will resonate with you if you have ever loved and lost a dog. 

After returning the copy back to my friend, I decided I couldn’t live without it on my bookshelves.  Not only do I now have my own copy, it is a hard back. Yea for ABE books!  

Karen Shanley now writes a blog titled Author Mom with Dogs (http://karenshanley.com/blog/). I enjoyed her book and am now enjoying her blog.

My Sew Sew Life-Yoga Totes Redux


Indigo Shibori Yoga Totes

Note on photo: The photo shows the front and back of the bags. One side has the double pockets and the other has the large circle motif.


During the last day of a Natural Dye class (last summer) at the Kansas City Art Institute, our instructor gave us a wonderfully generous mass of cotton. I had to turn this into something. The something that emerged was Yoga Totes for my yoga-practicing daughters.

Yoga Totes is a project combining three disciplines: dying, knitting (using a Bond knitting machine), and sewing. The main components are white cotton (from Dharma), white Shetland yarn (from me—well, from my sheep first), blue cotton lining (Hancock Fabric), and various machine embroidery threads (from anywhere). The bags are deeper than  regular totes.  This leaves room for blocks, extra clothes, and in a pinch a mat can be thrown in (it does stick out,  however).

Pre-reduced Indigo was used for both home and class pots. Dips were from anywhere from 15 seconds to three minutes were used. The wool yarn had the shortest dips. Caution was used because I didn’t want the alkaline environment of the Indigo to hurt my acid loving wool.


Our Fancy Indigo set up-a 5 gallon bucket-notice how  green the Indigo is. It will turn blue when it hits the air. 


Before the fabric was dipped, I created different patterns using Shibori*. I clamped, twisted, tied and banded. My favorite motif is the flower-type shape on the band and main body of the bag. These flower shapes were created with our old castrater gun for the sheep, the green castrating bands, and marbles. That tool has definitely been re-purposed!


Closer view of the fulled machine knitting with the machine embroidery

The knitted wool pockets were fulled in the washing machine. Not wanting to hand knit something that was going to be fulled, I finally learned to use my Bond knitting machine. I was very lucky that two Bond knitting gurus were at our last KC Fiber Guild retreat and got me jump-started. I would like to give a big thank you to Leslie and Shirley for their patience and expertise.

Finally, I put some of my machine’s decorative stitches through their paces and created my first embroidery with my embroidery component. The radiating sun fit in the yoga theme that I wanted and that motif was built into my machine.


Another nice little touch if your machine will let you-put the name of the recipient inside the bag-nothing like the personal touch!

This project combined three things that were fairly new to me: natural dying, machine knitting, and machine embroidery. Sewing is an old friend, going back to my very early youth. Shibori is not new but I had not really created much using it. Taking a Shibori course at KCAI simultaneous with the natural dye class certainly helped combine both disciplines.

*Shibori is the Japanese art of tie dying.

OK, so this photo is really unnecessary-but had to add the Poodle (Niko) eye candy!


Garden Thyme-The Iris Legacy

I finally started paying attention to my neglected Irises. This is a transgression on my part when considered from where most of them originated. They came from my mother. The Irises have been tenacious and hung on until I could come back to them. Well, I am back and they and I are working together to create something beautiful.
I have a vague childhood memory of my mom bringing a grocery bag of Irises back from a trip to her mother’s. There is a good chance that she brought some of those to me. I planted new Irises this past fall so I could possibly now be in charge of a three generation Iris garden.

Design a site like this with WordPress.com
Get started